January 4, 2012 – A year of portraits – Ricky Kirkwood

01.05.12 Ricky Kirkwood

01.04.12 Ricky Kirkwood

Today while out roaming the countryside on a beautiful winters day I came across Ricky Kirkwood on Kentucky 502 directing traffic for a DOT ditching crew outside of Nebo, Ky. I love the look of this picture starting from his direct look into the camera to the lines on the road leading back to the equipment working in the background.

I shot the picture with the Nikon D700, for page two of the paper, and then with my iPhone 4 with the native camera for this portrait of the day. As for the post processing on this picture: I opened up the portrait in SnapSeed and did some fine tuning in the contrast and sharpness areas, before applying the drama filter to it and de-saturating the colors slightly, due to the green hat and coat being so bright. Most of these type settings are purely subjective when working with a picture and I usually just play with the different effects till I get something I like. A lot of times though I have an idea in my mind of what I want the finished picture I’m shooting to look like, other times I don’t.

For the final Polaroid look for the picture I opened the corrected photo in another app called ShakeitPhoto which applied the frame to the photo along with the slight shadow along the inside edges of the photo. So, everything about today’s photo was done on the iPhone, except the posting of it to my blog here.


January 3, 2012 – A year of portraits – Marshae Hopson

01.03.12 Marshae Hopson

Today I met Marshae Hopson at the Madisonville-North Hopkins High School basketball game where she was waiting to watch a family member play. She called me over during halftime of the girls game to ask questions about the Nikon 5000 camera, which she’s considering buying. She loves taking pictures, but not necessarily having her’s taken, kinda like me. However she was gracious enough to allow me to shoot her portrait tonight for my project.

Camera of choice was my Nikon D700, which is my primary camera. Lens was a 50mm f/1.4 at 1/400th at f/2.8 with an ISO of 4, 000. I do love the D700 for shooting in low light, as I really don’t like using flash unless I absolutely have to. This image, as with everything I shoot with this camera, was shot on the RAW setting. I like using RAW as it gives me the most digital information that I can get from the camera, plus there’s a lot of processing I can do in the RAW file that gives me the best results in my opinion.

After bringing the photo into Photoshop CS5, I did some burning in around her to draw more attention to her great face and laugh. As a final step I used the Topaz Adjust filter “Photo Pop” to add a bit more sharpness to the photo.

This portrait just makes me smile!


January 2, 2012 – A year of portraits – Susan Cruzan

01.02.12 Susan Cruzan

Susan is one of my morning walking partners and as you can tell she doesn’t like to be cold! This mornings walk at the Madisonville City Park was rather brutal for all of  use, what with the temperature being one of the colder days we’ve had and a pretty stiff wind didn’t help us to stay warm much, but seeing her bundled up like this was a portrait just waiting to happen.

I shot this with my iPhone 4 with the standard camera, but I couldn’t really get it to look the way I wanted it too using the photo processing app on the iPhone though, so I opened it up in Photoshop CS5 to do my editing.

Basically did some dodging, burning and sharpening to come up with the final portrait. I did use the Topaz Adjust Clarity filter to achieve the sharping I wanted. If you’ve not used this plug-in for Photoshop before you should check it out as it has a lot of nice presets that you can also fine tune to your own liking. Of course you can achieve the results yourself via the different controls in Photoshop via layer masking, sharping, levels and things like that, but for me, I don’t like reinventing the wheel so to speak.

Susan is an excellent teacher by trade, among many other talents, and having just finished her Masters and is looking for work. So, if you’re hiring… let me know!


January 1, 2012 – A year of portraits – Flint Bone

01.01.12 Flint Bone

Today begins a new challenge for me and my photography. I plan on doing a portrait day during 2012 and posting them here on my blog. My plans last year were to keep the blog more active, but things seem to always get in the way and so this year I’ve decided to make it a year long project to keep my blog more active and also get back into the writing end of things.

Not sure what the portraits will be each day, how they’ll be shot or processed or even if the subjects will be human, after all there’s many different types of portraits and I want to leave myself open to what ever comes along each day. My guess is that most of them will be of people, but the possibility exists that something else will slip into the mix.

As many of you know I like tinkering around with different and new things, hence my iPhone 4 and all the different applications that are available for it will be part of my camera bag during this year long endeavor along with my regular camera gear. Also, I may use different techniques in Photoshop and other similar programs to finalize the look I want for each portrait. I’ll try to convey to you the reader what I’ve done to achieve each final picture that I post here. Not only do I want this to be a learning process for myself, but also for you my readers.

My first picture of the year is of good friend Flint Bone and being Sunday it was captured this morning at First Christian Church here in Madisonville, Ky. Flint and I have known each other I guess more years than either of us can recall. He’s the town locksmith and took over the Bone Lock and Safe Business from his dad, Jim Bone, a long time ago.

We’ve both been members of the church I guess since we were kids and the church was located at Main and Broadway here in Madisonville, Ky. Flint currently serves as an elder for our church and is into everything from photography to woodcarving. He’s one of those interesting characters that make my life much more enjoyable by just knowing him.

I used my iPhone 4 camera to make this photograph using the native camera that comes with the phone. I first tried post processing the photo with an application called ShakeitPhoto, which is available on iTunes, but just couldn’t get the look and sharpness that I wanted in the photo. As we all know digital photographs all seem to have a softness to them and for my tasted need a bit of tweaking. Of course the ShakeitPhoto app produces a color photo and what I wanted was a black and white version, but with the old Polaroid look to it.

So, since I couldn’t get quite what I wanted I went back to the original photograph, the program has a setting where the original photo is also saved to your camera roll before it’s processed in ShakeitPhoto, and brought it into another application on the iPhone called Snapseed (also in the iTunes store). Now, this application is similar to many other photo processing programs out there, but it’s probably my favorite one at the moment for the iPhone.

In Snapseed I then used the various presets to sharpen, convert to B&W and do a little dodging and burning in the photo. After I did all that I then opened the photo up in the Shakeitphoto app and processed it for this resulting image.

Work in progress

Arches National Park, Photo by Jim Pearson (c) 2011

Arches National Park, Photo by Jim Pearson (c) 2011

Well, it’s been a week since we got back off the road from our three week trip and I’m finally getting around to editing the pictures I shot with my D700. I hope to have some of them posted for your viewing pleasure in the near future as I didn’t take the time to edit and process them from the road. Most of all the photos that you’ve seen from me during out recent trip were shot and processed using my iPhone 4, which still continues to amaze me what you can do with such a small device now days. As I told my good friend Jose Lopez Jr. during our visit with him in Crestline, Ca, I really like my iPhone!

Most of the photos I shot using the D700 during our stay at Arches National Park were shot as HDRs and therefore will take a little longer to process, but I think the resulting images have a greater impact using the dynamic range you get with HDR. – Stay tuned and check back!

L.A. Photowalk

2011 Worldwide Photo Walk - Olvera Street, Los Angeles, California. - Photography by Jim Pearson, (c) 2011

"Lunch Break" 2011 Worldwide Photo Walk - Olvera Street, Los Angeles, CA. - Photography by Jim Pearson, (c) 2011

Well, I finally edited down my favorite photos from my participation in the Scott Kelby Worldwide Photowalk. This is the fourth year the walks have been done globally and my third year of participating. If you’ve never taken part in one you really should look one up close to you next year and take part.

Usually I participate in the walk organized by the West Kentucky Photography Club and good friend Rennan Quijano at one of the community locations we do in our surrounding area, but this year I was on the road and as my sister has mentioned in an earlier post on this site, we were in Los Angeles when the walk was held this year.

This years walk was different as the only other person I really knew was my sister, so it gave me a chance to meet new photographers that share the same passion for capturing slices of history and moments in time with their cameras. We all had a great time. Continue reading L.A. Photowalk

Old Friends

Ken and Manola Hackman listen as instructions are given for the next days events at the Combat Camera reunion.

Ken and Manola Hackman listen as instructions are given for the next days events at the Combat Camera reunion.

Well, today was the first day of my Combat Camera Reunion in Albuquerque, New Mexico and it amazes me that how easy it is to pickup with old friends that you haven’t seen for over 15 years. Don’t get me wrong because I do keep up with my fellow veterans, mostly though Facebook, but to actually see each other face to face it’s like it’s only been a few weeks and not many years.

Some of the names my many of military friends will recognize that are here are, Ken Hackman, Perry Heimer, Paul Harrington, Joe Coleman, Rob Marshall, Mike Creen and Bob Simons, among others.

We sat around and recalled old war stories from our days of capturing the history of the military with our cameras and when how things have changed in the world of photography from film to digital. It was great, but I finally gave out about 10 pm after a full day of driving and shooting pictures on the way here I was a tired puppy. Tomorrow morning we’re doing a group photo of those gathered here for the reunion before we all head off on a trip to Santa Fe for a day trip. Some are driving and others like sis and I are taking the train! When offered the option, what else was I supposed to do?

Still two more days of catching up, programs and war stories before we wrap things up. I’ll try to get some better images to show the group and what everyone looks like and has been up to over the next couple of days. – Stay Tuned!

First processing in a long time and camera samples

Here’s a couple samples from the first shots from my new “Analog Cameras” for our upcoming California and back roadtrip.

This is from the first roll on the Sprocket Rocket camera. Alas, the Epson V750 scanner I used to do this test wouldn't see the special holder that allows scanning of the sprocket holes so I had to use the one that came with the scanner which covered the sprockets. The image at the top of the site was also shot with the same camera. - Photos by Jim Pearson

This is from the first roll on the Sprocket Rocket camera. Alas, the Epson V750 scanner I used to do this test wouldn't see the special holder that allows scanning of the sprocket holes so I had to use the one that came with the scanner which covered the sprockets. - Photos by Jim Pearson


This is one of the images shot with the Holga 120 Superwide Pinhole camera. Pinhole photos have an inherent softness to them I had forgot about. Kinda nice, There's a ridge around the lens on the front of the camera and notice how the pinhole also caught the edges of it in the field of view. - Photo by Jim Pearson

This is one of the images shot with the Holga 120 Superwide Pinhole camera. Pinhole photos have an inherent softness to them I had forgot about. Kinda nice, There's a ridge around the lens on the front of the camera and notice how the pinhole also caught the edges of it in the field of view. - Photo by Jim Pearson


New Analog Cameras for upcoming trip

I just bought my first two “Film” cameras in probably over 10 years for my upcoming trip the middle of September. My sister and I will spend three weeks driving to California and back with the longest stops for my Combat Camera Reunion in Albuquerque, New Mexico, to visit friends in California and several days at Moab, Utah to do some shooting at Arches National Park. We will also stop overnight in many other place along the way of course… but I’m off the topic of my first post here, so let me get back to the cameras.

I wanted to do something different for this cross country trip, which I’ve done several times before over the years, mostly following the railroad to photograph trains. I saw a post on Facebook where a photographer had done a really nice series on events around the site of the twin towers in New York using a camera called a Sprocket Rocket. It’s a film camera that allows you to shoot panoramic photos on 35mm film and you can choose to use the sprocket area of the film to record your image on or not. I really liked the idea and purchased one from lomography.com for the upcoming trip. I’m currently working shooting some test shots for my first roll and will post a sample photo soon.

The camera has two settings for shutter speeds, 1/100 and Bulb, with two settings for f/stops which are 10.8 and 16… basically cloudy and sunny. So, it should be a fun camera to play with during my trip.

The other camera I bought from the same place is a Holga 120 Wide Pinhole Camera, It uses 120 film and since it’s a pinhole (f/stop around f/135) the only shutter speed is bulb! It’s also a superwide panoramic camera that shoots a negative/positive of 6x12cm, which is about two standard exposures on 120 film on one piece of film. Since I’ve got a bunch of refrigerated 120 film and still have my traditional darkroom, I’m in the process of shooting my first test roll of TMax 400.

I’m excited about the prospects of shooting with both these cameras for this upcoming and future trips over the years.

Of course I’m not going to be totally analog when it comes to the finished product with these cameras as I also bought film holders for both that will allow me to scan the film in to the computer and use my darkroom of choice these days, Photoshop.

Stay tuned… Jim

Photographing one person for a month

Since the beginning of December I’ve been working on a month long photography project of photographing the same person daily for a month and it’s been an interesting and challenging project. The whole event came about as the last month of a year long project I’ve been doing that involves taking a picture every day for a year. Along the way I’ve done several theme based months to help my project along and break up the routine.

My subject for the month is Gabe, a 7-year-old that is full of energy and imagination. My approach was to find out from his mom Tina just what all Gabe was into. We compiled a list of photo ideas that made up about 25 of the days in December and are filling in the remaining days with pictures that come up we didn’t think about in advance, and a couple have already done so. After compiling this list the shooting began.

We try to let Gabe decide what picture situation he’d like to do on a particular day since I wanted it to be a somewhat fun time for him as I thought that it would help capture a more natural look to the photographs that I shoot. Putting your subject at ease when shooting goes a long way at capturing images that show their true personality and I think that allowing him to pick the theme each day has done that for Gabe. Of course there’s some days I pick the subject as there’s some things I think are important to show what the life of a 7-year-old is like that perhaps he’d just as soon not show, such as doing his homework.

I try to keep the time spent each day on the photo shoot short as the attention span for a 7-year-old can start to dwindle as the minutes tick by and so I don’t want to drag the shooting out longer than necessary.

I plan on publishing my first photography book as a result of this project so stay tuned.

ClassicPAN… a great iPhone application

I’ve always enjoyed shooting panorama pictures and for a long time I did so with a Fuji 8x17cm camera and currently have a 4×10 Patrick Alt view camera, but here lately I’ve been using a application for the iPhone called ClassicPAN which I’m really having fun with. The conventional iPhone camera stores picture files at a 4:3 aspect ratio, but ClassicPAN stores the same photos in a 9:4 panorama format cut at the top and bottom, resembling the output of a classic camera.

The app pretty much does what the Fuji and my 4×10 cameras do and that is take a picture where the film size actually crops a standard photo into a panorama. ClassicPAN takes the image (full frame) and basically crops it into a 12.96″ x 5.76″ image @200 ppi and shot with the iPhone 4’s 5.1mp camera you get pretty good quality for printing.

I have noticed that I’ve had to make shooting adjustments as the app does include more than you see in the application when you take the photo. I’ve gotten used to this and just preview the resulting image after shooting and if it’s not framed just like I want it then I just shoot another photo. I know I could just open the full frame photo and crop it in Photoshop or a similar program, but that wouldn’t be the same for me.

Other things about ClassicPAN is that it comes with is 13 film options ranging from Normal Negative to one called X-Proc Color and each of them have their own distinctive look. It also has an exposure compensation setting that ranges from + or – two full stops. It also has a set of five filters that you can put on the lens which are clear (skylight), red, yellow, green, and blue for another option for effects, plus the camera also uses the built in flash on the iPhone 4.

To enable the app to save your created pans in the highest quality make sure you go under your iPhone settings and select the ClassicPAN settings and turn on High Quality Prints and any other options that you find there.

For $1.99 I really don’t think you can go wrong in adding this app to your collection. Below are a few photos I’ve done with ClassicPAN. Click Graphic to visit App Website

Here’s what the app looks like:

photocrati gallery

Here’s some ohter Images I’ve done with the camera.

Sometimes color casts are good!

Photo by Jim Pearson

Most times I hate dealing with color shifts in my pictures and work hard to get rid of them, but today’s Santa Helper photo shot with my iPhone 4 actually helps add to the festive Christmas scene this morning at the Mall. Rain and cold weather drove me and my friends inside today and when I saw the Santa area setup for the Christmas Season I remarked that it’d be nice if I had someone sitting in the chair for my picture of the day and friend Megan Robertson jumped right into the chair for his amusing photo. I used the built in camera and did the processing of the photo using Photoshop CS5 and the Topaz Adjust “Clarity Filter” for the final photo. The border was applied using the stroke command in Photoshop.

The first 13 days shooting with my iPhone 4

This month as part of my year long photo a day project I decided to shoot my pictures for this project with my iPhone 4 and while I had planned to post daily and talk about the things I’ve learned using the iPhone 4 for my camera it’s been busy. So today’s post will cover the first 13 days of my project and some of the programs I’ve used along the way that I think some of you may be interested in.

11.02.10 Kenny Embry with the Hopkins County Schools maintenance department works against the late morning sun Tuesday at Hopkins County Central High School to change out one of the lights in the parking lot at Mortons Gap. Photo shot with the native iPhone 4 Camera App and processed in Photoshop CS5. - Photo by Jim Pearson

After the first 13 days I’m finding that for most of my shooting the camera I’ve been happiest with is the one that is built into the iPhone 4. It gives the full resolution of the camera and a unedited jpg from the phone is a little over 14mb when opened in Photoshop. This is a much larger and better quality file than I used to get when I first started using 35mm digital cameras back in the beginning when I was using a modified Nikon/Kodak joint venture that had a tethered hard drive that was slung over your shoulder (a whopping 20mb in size) to store images on.

While I love the crisp screen on the iPhone 3, I do find that when shooting in extreme situations where there’s bright light, like outdoors during the daylight, that it can be difficult to see the image on the screen because of the reflections on the glass screen. I’ve learned to deal with it and have considered putting a screen protector of some sort on it, but don’t want to give up the nice clear look that I love when working with it. I’ll have to look around and see if hoodman or someone has come up with some sort of a hood that you can use on the phone when shooting with it.

As with most digital cameras one thing that the iPhone 4 doesn’t like is shooting directly into the sun, so for the most part I’ve found it’s best to position the sun behind my subject or somewhere in the frame where it’s shielded as with my second picture of the month of Kenny Embry changing out a light at Hopkins County Central.

I started out the month doing most of my work with this camera and then opening the picture up on my desktop and editing it using Adobe Photoshop CS5. You could use just about any program to do your editing with, but I’ve been using Photoshop since version 1 back in the 1980’s and it’s the one I am comfortable with.

What I do with a picture once I get it into Photoshop varies from photo to photo. If I’m working on a picture for the newspaper I usually stick to what could be done in a traditional photographic darkroom, except a bit easier with the computer. Dodging, burning, removing dust or spots that always find their way to my sensor and of course sharping. Otherwise, it all depends on what I feel is in the picture that I want to convey.

I’ve used several other iPhone Apps this month that I’ll highlight and provide links to here that have been some of my favorites so far.

Click Graphic to visit App Website

Camera+ is an iPhone App that I’ve used a lot for post processing of pictures after they’ve been shot with the built in iPhone 4 Camera. While I’ve not done much shooting with it I have used it to processing some of my photos on the iPhone and really like some of the filters and other effects that it allows you to do on this little hand held device. So much power in such a small box. It sells for $1.99 on iTunes.

A great website that reviews apps like this is http://www.iphoneography.com and here’s what they have to say on this app. “Camera Plus (App Store Link) takes full advantage of your iPhone’s accelerometer to help you take pictures that are blur-free and straight, by continuously monitoring your phone’s position, Camera Plus is capable of taking pictures quickly and efficiently, without any added delays.

Camera Plus is also aware of your device’s orientation, automatically rotating pictures to account for whether you are taking a picture in landscape or portrait mode.”

Click Graphic to visit App Website

Another of my favorite apps that I’ve been using for awhile is called Photogene. (App Store Link) It also has a full set of features which I’ve used for post processing of some of the photos I’ve been shooting. This app has been referred to as “the iPhone’s Photoshop.”

I find that this so far has been on of my favorite apps as I’ve been using it for several months, even before I got my iPhone 4. It’s easy and fast to use and does a good job of adjusting just about everything when it comes to picture processing on the iPhone. It sells for $2.99 on iTunes.

iPhone Photography’s website has a great video on the app here…

Click Graphic to visit their Website

I’ve also been using a plug-in for Photoshop called Topaz Adjust which has a really nice set of preset filters that you can apply to your photographs. Many of them are things you could accomplish yourself manually in Photoshop, but they’ve put them together into a interface that makes life simplier. While many of the filters have presets, all of them can also be adjusted to suit your tastes which is a great feature. The set runs $49.00 on their website, which is a great investment for what they do.

There are some hefty requirements to use this set of plugins however which are:

Windows

  • Requires Windows XP, Windows Vista, or Windows 7
    (32-bit and 64-bit)
  • Requires at least 1GB RAM, preferably more.
  • Compatible with Adobe Photoshop 7-CS5 (32-bit and 64-bit), Adobe Photoshop Elements 1-9, or another editor that supports Photoshop plug-ins. These include Irfanview, PaintShop Pro, etc.
  • Compatible with Lightroom with free download Trial.

Mac

  • Requires Intel-based Mac OSX 10.4-10.6.
    PowerPC processors like G4 or G5 are not supported.
  • Requires at least 1GB RAM, preferably more.
  • Compatible with Adobe Photoshop CS3 – CS5 (32-bit and 64-bit), Adobe Photoshop Elements 6-9.
  • Compatible with Apple Aperture 2 and 3, Adobe Lightroom 2 and 3 for Mac, and iPhoto with free download Trial.
Below is a gallery of the images I’ve done the first 13 days of this challenge..
photocrati gallery

iPhone Photography Project

iPhone Photo by Jim Pearson

iPhone Photo by Jim Pearson

This month as part of my year long photography project that I’ve been working on where I shoot a picture a day, I’ve decided that during the month of November I’m going to shoot all my pictures for this project with my iPhone 4.

Along with that I’ll post information on what iPhone 4 Camera, darkroom and other applications that I use in the process of shooting this month.

I’ve often been asked, what’s the “best camera” to use when shooting pictures and in a nutshell, it’s the camera you have with you. Now, with that being said, obviously some cameras offer better quality, speed, ect than others, but still it comes down to what camera you actually have with you when the picture presents itself that get’s the job done. Don’t get so hung up on your camera equipment to the point where you don’t pay attention to the picture in front of you.

My iPhone 4 goes with me everywhere and while at 5mp the quality isn’t nearly what my Nikon D700 is, but it’s still good enough to get a decent size print if I want one. Hence this month I plan on  learning to use it better and how to maximize the quality by using the tools available to me, which I’ll be sharing here. I hope you enjoy my journey and I’ll post a picture and review on how I did it daily.

Today’s photo was shot early this morning at the Madisonville City Park Lake using the built in iPhone 4 Camera. I like how I can tap various areas in the picture and change the point of focus and exposure. Of course it also gives great quality as it’s the native camera app for the iPhone. This, like most of the other apps I’ll use through the month, really doesn’t do a very good job of zooming however, so for best results just shoot with the camera using the camera on it’s normal zoom position.

I then copied the picture to my computer and used Photoshop CS5 with a little dodging and burning along with the Topaz Adjust filter to come up with this final photo.

Keep Clickin!

It’s not the camera

Photo by Jim Pearson

Photo by Jim Pearson

I always hear people say, “If I had a camera like yours, I could get better shots”, and my response to them is that it’s not the camera that takes the picture, it’s the person behind it. Case in point is this photo I shot during Pennyrile State Parks Fall Photography Weekend.

When I got out of the car to venture out into a field I decided the leave my Nikon D700 in the car and carry my Nikon Point and Shoot digital camera instead.

It’s a Nikon 8000 and has a closeup mode, as most point and shoot cameras these days do. After venturing around I found this little winged creature chomping away of this leaf and started taking his picture. After a few frames he just turned and looked directly at the camera as to pose and stayed that way for several shots, which resulted in this final image which won first place in the Close-Up category of the Masters Division of the competition.

I’m not saying that better equipment won’t help your photos, but I am saying don’t get hung up on what kind of camera equipment you’re using. Learning to take the best pictures you can with the camera you have is what you should be concentrating on. Remember, “The best camera is the one you have with you.” Keep shooting…

Changes underway

When it comes to photography and websites there always seem to be changes underway and my website is no different. If you’ve stopped by recently you may notice some changes are underway with my look and design. Be patient with me as I work on fine tuning my settings to get the site updated and looking the way I want it to.

I’ll also attempt to update the site on a weekly basis and plan to add an area where folks can purchase prints of my work, which is something many of you have asked for.

I’ve always felt like a teenager even today at 59…

When I woke up Thursday January 7th, 2010 I thought the slight pain in my lower intestine was perhaps something I ate the night before is wasn’t anything serious, just another discomfort and so with the first real snowfall of the year still coming down I decided to head out in the morning to look for some photographs and decided to capture of all things trains in the snow. I headed out early in the morning as I wanted to try an capture blowing snow as new trains made their way long the CSX Henderson Subdivision. What seemed like forever the trains started to move and I was able to capture several images that I was happy with and headed back home to get ready for work for what would prove to be a short and yet long day.

The main assignment for that day was to head out to the scene where a body was recovered in the frozen ice earlier in the day. After an interview with with the local Deputy Sheriff by Erin, one of our reporters we got directions and a satellite map to the scene where they had found the body of the man who we found out later was that of a man that had been missing since Thanksgiving. The location would require a long walk, about a mile each way.

When we first arrived my lower intestine was about the same and I was starting wonder if I wasn’t coming down with intestinal flu. We parked my SUV and started down the path we thought would lead us to where we needed to be to get a photo for myself and a feel for the scene for Erin, our reporter. With the 25lb or so camera bag slung over my shoulder we traipsed down the snow cover path till we can to a dead end an determined we needed to go back to the SUV and start over. After about another 15min we arrived back and looked again over the satellite map and decided that it was in a different direction.

I decided, based on how I was feeling that I’d only take my D700 with a 18-35mm f/2.8 lens with me instead of the bag. Wasn’t feeling a lot better and while I wanted to get a photo to go with the story I really at this point didn’t feel up to the task at hand, but sometimes you have to do what you have to do.

We headed along our new path and sure enough we found the tracks from where the Emergency Management folks and Sheriff’s Department investigators. After a short walk we found the railroad tracks, which I found out had been closed for several hours due to the investigation, that would eventually lead us to the location we were searching for. As we walked along Erin and I both remarked how this felt a little like Stephen Kings, the body as it was found by a couple teenagers playing on the frozen creek. We were looking for an old basketball next to the tracks as that’s where the detective told us to enter the woods, but we could see the rescue boat tied to the trees just off to the right. I was concerned that I wouldn’t have much of a photo before this as everything had already been cleared from the scene… I felt better that I would have a piece of art to go with the story, even though we couldn’t get out to the location where the man was removed as it was about 50 ft across the creek. After shooting till I felt that I had something that would work we headed back to the car and the paper.

Thursday afternoon, a rescue boat from Hopkins County Emergency Management Agency is the only thing that remains at the scene after recovery of the frozen body of 43-year old Barry Eugene Daves, who had been reported missing since the day after Thanksgiving. Daves was found in the creek straight out from the boat where the tree is leaning into the water. (Jim Pearson/The Messenger)

By the time I got back the paper I had already decided that after finishing with the captions and photos for Friday morning’s paper that I was taking a sick day because of how I was feeling.

Heading home around 6pm I stopped by Walgreens to pickup to NyQuil as at this point I was sure I had or was coming down with intestinal flu. Boy would I prove myself wrong on this count.

Later that night I edited and posted on of my photos of two trains meeting in the snow for the project I started for the West Kentucky Photography Club that involves shooting a photograph a day for 2010. After loading my photo for the day I took a dose of NyQuil and headed to bed thinking the way I felt that I’d be calling in sick on Friday.

Photo for Thursday, January 7, 2010

January 7, 2010 – North and southbound trains meet at Crofton, Kentucky in during the first measurable snowfall in the area for 2010. – Photo by Jim Pearson

I spent most of the day Friday watching TV and piddling on the computer under the influence of NyQuil. At least it seemed to be helping my symptoms of the intestinal pain. I decided that it was time to head to bed about 10:30 pm when I realized that I hadn’t shot my picture for the day. I wanted to make sure and keep my commitment going for the others participating but that late at night all I could get motivated to shoot was a photo of myself in my home office. It would work for the day and I took a dose of NyQuil and headed to bed.

Photo for Friday, January 8, 2010

01.08.10 After fighting sickness for the last two days this is about all I can muster up at 10:30 at night. A least I feel well enough to be up and around somewhat. Still have a slight fever though. – Photo by Jim Pearson

When I woke up, or should I say got up Saturday morning I had already decided that I needed to go to the Dr. and see about getting my issues looked at. I had spent the better part of the night tossing a turning and never being able to get comfortable enough to sleep. I got dressed and headed off at first to the care center at Trover Clinic. Usually I deal with the VA clinic at Ft. Campbell, or hospital in Nashville as I’m a retired veteran of 24years in the Air Force, but knew I wouldn’t be able to make it to either place on my own.

I got right in at the clinic, but the staff there advised that I go to the ER as there would be some tests needed that they don’t have access to do on the weekend, or I could run back and forth if I’d prefer. I know that wasn’t going to happen and drove the other 1,000 ft or so to the ER at Regional Medical Center… one of the best decisions I ever made.

After doing paperwork and about a 15min of waiting the nurse called me back and after asking some questions and taking she lead me back to an exam room for vitals and more questions… number one being what’s your pain level from 1 -10. At this point I told her about a 5 or 6. We continued to talk for awhile waiting for the doctor and she at this point said it sounded perhaps like the intestinal flu that has been going around our area, however after the doctor started poking and prodding he raised my pain level real quick to a 10plus.

When he said he thought I had appendicitis I was floored as the thought had never, ever entered my mind. After sending me down to CT which confirmed his diagnosis they brought on the on call surgeon and started prepping the OR down the hall to remove it.

When Dr. Harbin first came into the room he introduced himself and asked how a 59 year old ended up with what is considered mostly a teenagers disease. At this point I’m not sure if was me or my sister April or someone else, but someone remarked that have always acted like a teenager. He headed off to get ready as a steady stream of people coming through asked me questions about my history and the upcoming operation.

When the room finally quieted down and paperwork was signed I knew it wouldn’t be long before heading down the hall and realized again… I didn’t have my picture for the day. I had brought my camera with me as I always do, but it was out in the car and knew there wouldn’t be a chance to get it in time so while knowing that my Razor cell phone took lousy photos, but decided that it would fine showing just how I was feeling.

This was my photo for Saturday, January 9, 2010 just before heading off for surgery.

01.09.10 At the ER waiting for surgery to have my appendix removed. – Photo by Jim Pearson

About the only thing I remember of the operating room was when I moved over to the operating table and the mask when the anesthesiologist started to put me under.

When I woke up in my room it was quiet and tubes were running into me from what seemed to be almost every orifice of my body. Of course they weren’t, but they were in places I’d rather they weren’t, but that’s life. Can’t remember who was the first to come in the room while I was awake, but the first memory was that Dr. Harbin told me that things went well, but the appendix had ruptured and had gangrene. They were able to remove it Laparoscopicly, but he was concerned that the gangrene may force him to go back in normally if things didn’t go well. His plan was for five days of antibiotics and fluids, in the end it would be about six days.

Sunday, January 10th, 2010 had a fairly steady stream of visitors and family (who all kept their visits very short) and a lot of time pushing the pain meds button. To me this was worse than being ran over by a 747, much worse. I remember folks from church stopping by to pray and visit, watching TV and dozing most of the afternoon. Before trying to drift of to sleep I shot another photo with my cell phone for the picture of the day for Sunday.

January 10, 2010

01.10.10 One of my favorite machines… used to help clear my lungs the day after surgery. – Photo by Jim Pearson

Sleep was a welcome relief, even though it came in spurts of an hour or so at a time. My body wasn’t used to laying in bed for long periods of time, but with some of the tubes that were attached getting out of bed wasn’t that easy. Thankfully one of the major ones came out sometime Monday afternoon and I was able to get out of bed and make my first walk around the ward. Nausea was a matter I dealt with after getting back into bed, but with some meds and a little bit of self help, I got relief after awhile. Dr. came by and said thing were looking good and were going to continue with the regimen.

Photo for Monday, January 11, 2010

01.11.10 Visitors, brother Dannye and friends, Tom and Toni Wortham stop by on Monday for a short visit, – Photo by Jim Pearson

Been up sitting and walking more Tuesday, but still had issues with the nausea and it was to the point the Dr. decided that I needed to have an NG Tube inserted through my nose to the stomach to control the nausea. Of course I had one during the surgery, but never remembered it. This one I’m not sure I’ll ever forget. While it gave me relief having a tube passing through my nose, pass the tonsils and down the throat is not anything I’d recommend. After awhile though I got kinda used to it and the daily routine of getting back on my feet continued.

Photo for Tuesday, January 12, 2010

01.12.10 Tuesday they put an NG tube in… not a fun experience, but it gave me relief. – Photo by Jim Pearson

Wednesday I starting to feel better. Still had the NG Tube along with IV Fluids and Antibiotics that were fighting any type of bug that might still be in my system. More visitors stopped by and the nausea has started somewhat to subside. Hadn’t had any issues since they put it it thank goodness. Can’t imagine throwing up with an NG tube in. More walking, sitting, watching TV occupied my day along with the fantastic nurses, CNA and other staff members at Regional Medical Center that helped with my healing. Tonight was the first time I decided that I wanted to try and sit/sleep for awhile in the recliner in my room. Wasn’t sure how well I could get in and out of it, but with a little help from the staff it was a good decision. I got perhaps one of the best nights of sleep Wednesday night.

Photo for Wednesday, January 13, 2010

01.13.10 Warenna and Tom stopped by for a visit. – Photo by Jim Pearson

Thursday they took the NG tube back out…. was easier than getting it in, but still not a fun or recommend experience unless needed. Dr. stopped by in the afternoon and said things looked really good and planned to let me go home on Friday. Mixed emotions as I wanted to go home, and I was up out of bed more than I was in it, but the security blanket I’d been wrapped in for almost a week was hard to let go of. Rest of the day was spent visiting with folks that dropped by, getting somewhat better photos since my sister had brought me my D700 camera with the 18-35mm lens.

Photo for Thursday, January 14, 2010.

01.14.09 Thursday found me eating semi-solid foods. – Photo by Jim Pearson

Friday I got my freedom from the Dr. and was allowed to go home. My sister stayed with me for the following week to hep with my recovery and did a great job. Had my first “real” meal in over a week and I can honestly say that my brother cooks much better. Chicken, Green Beans, Mashed Potatoes and corn was great! First real solid food and it was great.

Photo for Friday, January 15, 2010.

01.15.10 Friday night at home eating food prepared by my brother David… first solid food since going into the hospital and he cooks much better. – Photo by Jim Pearson

Well it’s now the 29th of January and the last week I’m slowly getting back on my feet with being up and about more, including walking 1.25miles daily at the city park. Dr. said I can return to work on Feb 2nd with the following limits for a couple more weeks, no lifting over 8lbs, running, skipping, hopping, twisting and bending. Looking forward to getting back into things. Below you’ll find a few more of my daily images I shot for the West Ky Photography Club’s year long photo challenge. Others you’ll find in my gallery.

The past few weeks have really been a bear, but at the same time good. Sounds strange I know, but it’s always an eye opener when one goes through this type of event and it makes you appreciate things much more that you’ve always taken for granted. Stay safe and healthy folks!

01.16.10 Saturday was spent at home watching TV from my favorite recliner, and of course it was a hospital show called Gray’s Anatomy. – Photo by Jim Pearson
01.17.10 Sunday was my first day out of the house and after we went to see the Book of Eli, my brother David made dinner. – Photo by Jim Pearson
01.18.10 Monday Dannye my brother and his wife Jeanette stopped by for a visit and my cat Socks fell in love with her. – Photo by Jim Pearson
01.19.10 Socks needs to be brushed. Two weeks is too long for a long haired cat. – Photo by Jim Pearson
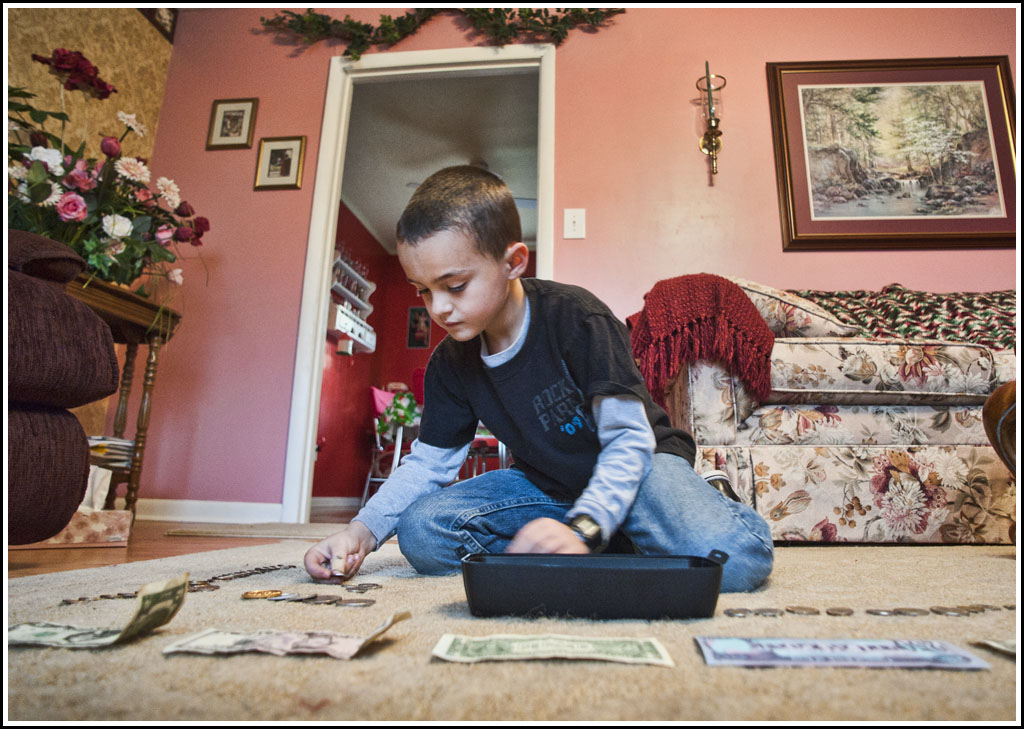
01.20.10 One of my young nephews, Cain, loves trains and this is the collection of spikes he’s collected from along the railroad tracks by my house. – Photo by Jim Pearson
01.22.10 My sister April works on a article for a client. Doesn’t really like having her picture made, but since I’m her brother she puts up with it. – Photo by Jim Pearson
01.23.10 P&L Railroad track side Building at West Yards, Madisonville, Ky. – Photo by Jim Pearson

Sunrise at city park, Madisonville, Ky

Geese and ducks at Madisonville City Park are beginning to run out of water to swim and feed in as the sustained cold temperatures have begun to freeze lakes and ponds as in this early morning sunrise Tuesday. Weather forecasters are calling for the area’s first significant snowfall for the year, with the possibility of 2-3 inches by Thursday. – Photo by Jim Pearson

01-05-10-city-park-lake